First Tomatoes! (Victory Garden weeks 12/13)

The first cherry tomatoes ripened this week! It was so exciting. Uli’s reaction was priceless. “Ahhhhhhhh!!!” followed by a big bite and then another. I’ll have to wait till the next ones are ripe to tell you how they taste. Uli gobbled up all three of them. I’m glad she’ll have something else to pick strait from the garden. The snap peas are almost done. They’re not so happy in the heat. I’ll be pulling them out this week to make room for the cucumbers.

SDC12620

The zucchini’s threatening to take over the garden! Next year I think I’ll give the zucchini it’s own bed. Another lesson learned…

SDC12624

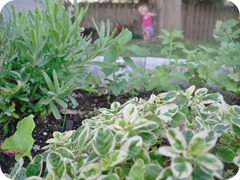
I also planted some herbs in their own pot. They’ve almost filled it in. Uli and the pups like to hang out under the tree right behind it. It’s the yuckiest part of the yard and they love it!

SDC12623

Here’s Uli Belle by the zucchini monster. I hope she’s eating peas in this picture… The dress I just made her turned out so cute. I’ll be posting directions for how to make it this Friday.

SDC12650

Bright Lantern How to

The front of our house needed a little more life. This is the inspiration for my front porch makeover.

SDC11932

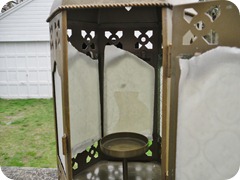
I’ve been seeing these beautiful powder coated lanterns. They come in really bright colors like lime, yellow, and orange. And they are surprisingly difficult to find on the internet. I’ve come across them at TJ-Max and various small garden shops. The first place I saw them was this place in Lake Leelanau, MI called Jack of the Green. ( If your in the area. Stop bye. Good stuff.) So, I know they’re out there.

This links for one good example I found.

http://www.ningbojc-crafts.com/html/Moroccan-candle-lanterns-with-green-color-JML1165-SML-green.html

This project took about two hours. Then two days to dry.

You will need:

  • a lantern
  • masking tape
  • an exacto knife
  • sand paper
  • alcohol prep pads
  • brightly colored spray paint (you may want primer if your lantern is dark)
  • clear gloss spray paint

SDC11869If your lantern is painted or has rust. Start by sanding it down. (If it’s new and relatively smooth you can skip this step)

Next thoroughly clean any surface you will be painting ( a damp rag should work fine for this).

SDC11871Cover any areas you don’t want to paint with masking tape. ( You can see the chairs I painted to match in the background here)

SDC11874Use your exacto knife to gently cut around the window opening. Do this for all of your lantern windows.

SDC11876Cover the inside of the windows too. (You don’t have to be so exact here. Just make sure they’re covered)

If you want to be really tidy. Wipe all of the surfaces you want to paint with alcohol prep pads.

SDC11877Now your ready to paint! Paint following you spray can instructions.

It was so hard to wait until the paint was completely dry to hang this! I’ll show pictures of the front porch a little later in the season when I have some flowers blooming.

Fancy Sandals! No sew, sandal, craft project

This project was inspired by the wonderfully warm spring we’ve been having. My sandals were in sad shape when I pulled them out of the basement. They needed help or it was time to get new sandals. Wanting to avoid buying new unless absolutely necessary, I opted for a sandal update. I think I did it in less than an hour. It was super fun and easy!

You will need:

  • a pair of sandals to fix up ( If the sandals you want to fix are plastic, they may melt. Check before starting. If your sandals melt you can prabably do the same thing with glue. I used the stitch-witchery because it’s fast and easy to control.)
  • 1/4 yard fabric ( I recomend cotton, linen, or hemp. They handle ironing and abuse a bit better that other fibers)
  • 1/4 yard stitch-witchery
  • scissors
  • iron